Thursday, July 4, 2013

Zombie Survival (Candy) Kit

     My friend, Chelsea and I wanted to make a really amazing gift for our buddy, Garrett this year. After thinking about it and knowing we didn't have a lot of money to spend on his gift, we decided to build him a Zombie Candy Survival Kit. :D So Pinterest was our friend in this endeavor! 

     We used these as guides and used our brains to add more! (^_^) 
Candy List:
M&M's (Pretzel) x 2
M&M's (Original) 
Reese's Peanut Butter Cups x 2
Smartees
Candy Cigarettes
Fruit Roll Ups (Still in their box)
Resident Evil T-Virus Antidote Soda

Extra Items: 
2 Ammunition boxes (one was for Rifle Cartriges and the other was for .22's)
 Empty Medicine Bottle **Wash before using!!**
Large Ammunition Container
Flashlight
2 Little Nerf Guns
Packing Tape
Scotch Super 77 Multi-Purpose Adhesive Spray
Anti-Zombie Pictures (included in Tutorial)

So this is what Chelsea and I did!

Step 1: We emptied the ammunition boxes and filled one with Reese's Cups and the other with Smartee's! 


 Step 2: Stuff a Flashlight with M&M's


Step 3: I took a large, empty pills bottle (I washed it before hand, because I didn't want any residue to get on the candy) and filled it with 2 bags worth of Pretzels M&M's! I made the label via Microsoft Word and used packing tape. Everything on the label was made up, though I used a generic templet from Google.


Step 4: Wrap a box of Fruit Roll Ups with white paper and this picture! (^_^) You can add words if you want to! I just fixed it in Microsoft Word. 


Step 5: Include the simple items like the Candy Cigarettes  the Resident Evil Soda, Nerf guns and bullets, and the Zombie Survival Guide. 


Step 6: Decorate the Ammunition Container! (^_^) I only used a few items.. I printed them on paper, cut it out and glued it on using the Scotch Super 77 Spray! (Be careful, it's SUPER sticky!)


And a close up of what it looks like all inside the container


And here is our buddy enjoying his gift! (^_^) Happy Surviving! <3


Friday, January 11, 2013

Tutorial: How to make an awesome belt buckle!

OK! So, first let me tell you what you'll need! 
 sticker/decal or item you'd like in the belt buckle
(I got the deadpool image custom made by ProjectCustom)
 measuring cup
something to mix the resin (I use a small Popsicle stick)
heat gun
gloves


OK! So I kinda cheated and started this project a while ago. I bought a deadpool decal from ProjectCustom back in November. The reason I wanted a decal, instead of printing it out on paper, is because decals are thicker, stronger and look better. Printer paper is thinner and the resin makes it have a watered down paper look sometimes. (example)

What I don't have pictured is the fact that the Deadpool decal was just a smidgen smaller than I wanted it to be. SO! How do you fix something like that, Heather?! Good question! It's super easy to fix! What I did was I used black nail polish (which I have a lot of haha) and painted the inner part of the belt buckle. I actually did 2 coats! 
If it's bumpy, no worries! It'll all be ok!
Once it dried, I did my best to line up everything. (Don't be a perfectionist. If someone is really staring at your belt buckle for a long amount of time to see that it's not "straight," you need to tell em to back off!)
Anyhow! I smoothed it out as much as possible and it came out looking like this:

Today:
I have a Pokemon belt buckle that my friend, Liz, made me for Christmas in 2011. I wear it a lot! Super love it. Anyhow, today, I noticed that it looked like it had a huge bubble in it! Turns out, the resin was coming off the Pokemon sticker! I slowly pulled the resin off, careful not to tear the sticker. Thankfully, everything came off at once! So I'll be making an amount of resin to make 2 belt buckles!
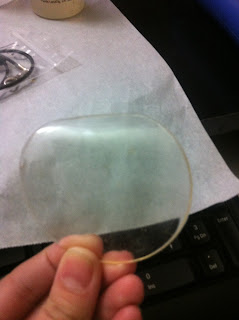
See what I mean? It just came right off! 
Now! It's time to make your resin! I use EasyCast 


Arm yourself!! This stuff gets sticky! So wear gloves!!


EasyCast is a 50/50 mix. You use it in equal parts. I usually start by putting in the resin. Today I only did 1 Dram each. (IDK what a dram is, but use your best judgment when measuring. Just remember that first amount will be doubled!!)

Next, add your Hardener (it's ok to have a little bit more hardener than resin.. but try to get it as equal as possible.)

Mix it up till it's like the color of champegne. Don't worry about the bubbles! 


Pour the resin in slowly!! You don't want to over fill the buckle!!
                         

The best way to get rid of bubbles is by using the heat gun! Keep it about 6-10 inches away from the resin and move in a slight back and forth motion. If you need to, you can get closer, but be careful to not have it too close! (It can make the resin go over the ledge.) If you need to, get a small pin to pop the little bubbles! After the bubbles are all gone, it should look crystal clear!


LET IT DRY FOR 24 HOURS!!

I'll be making more belt buckles this year to post at All Things Cute & Nerdy